
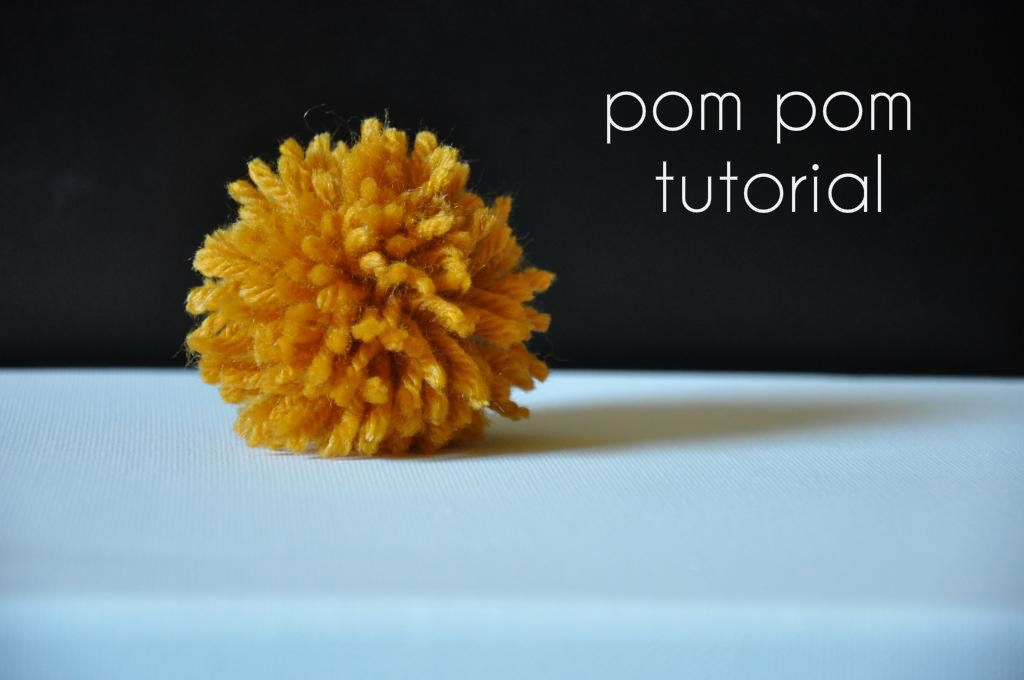
My front window needed a little sprucing up for this Thanksgiving month, so I put my yarn stash to good use and made a pom pom garland. Here's the how-to:
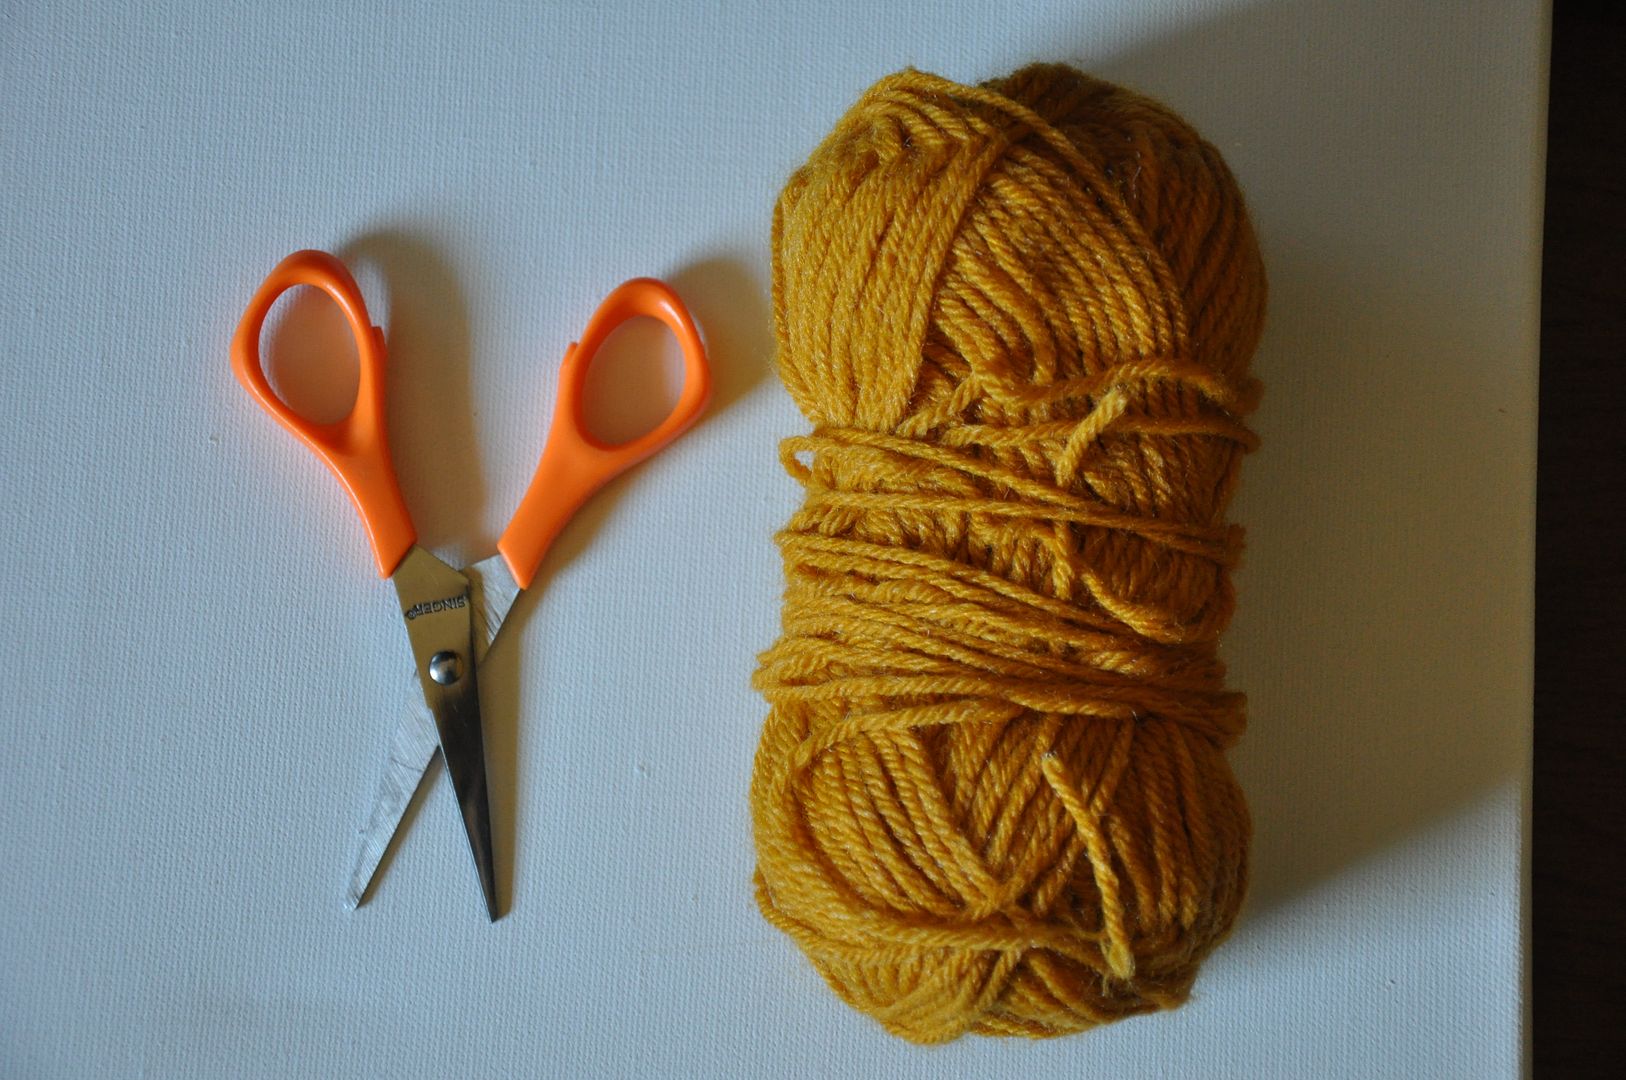
1. Gather supplies: yarn of choice & scissors
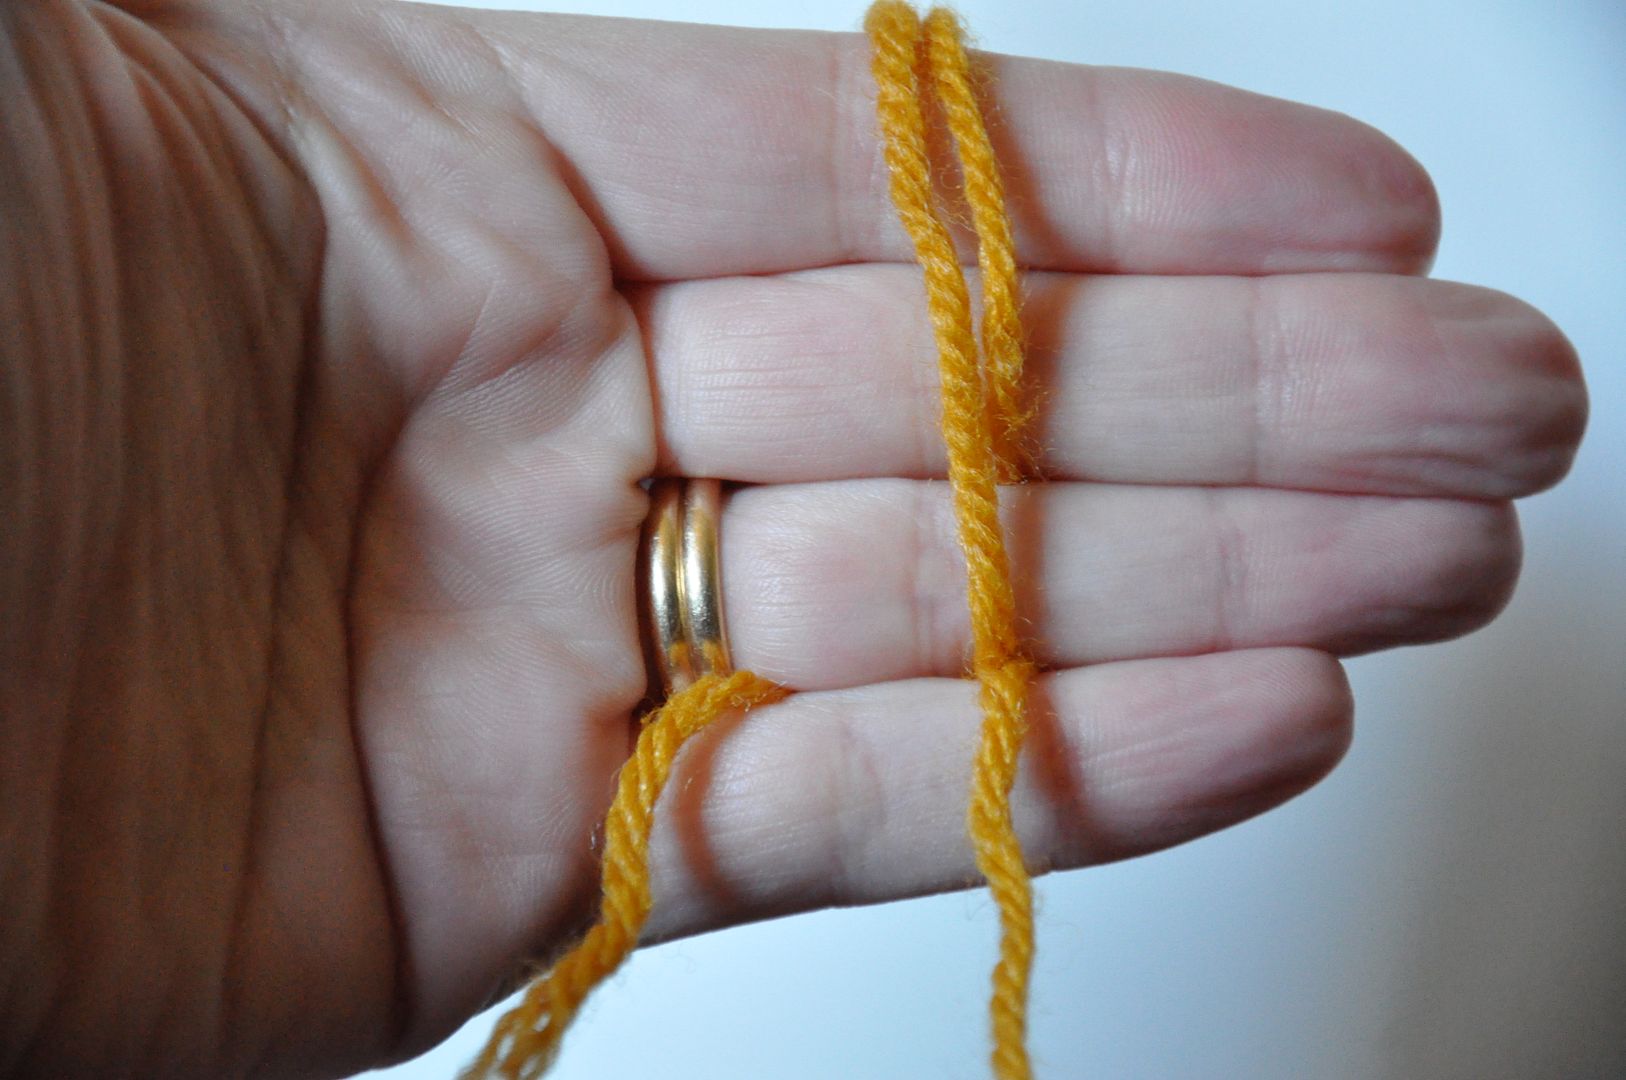
2. Cut one long piece of string (about 10 inches long) and set aside. You will need this later.
3. Hold up three fingers vertically and wrap yarn over the top two fingers and then behind the bottom (third) finger.
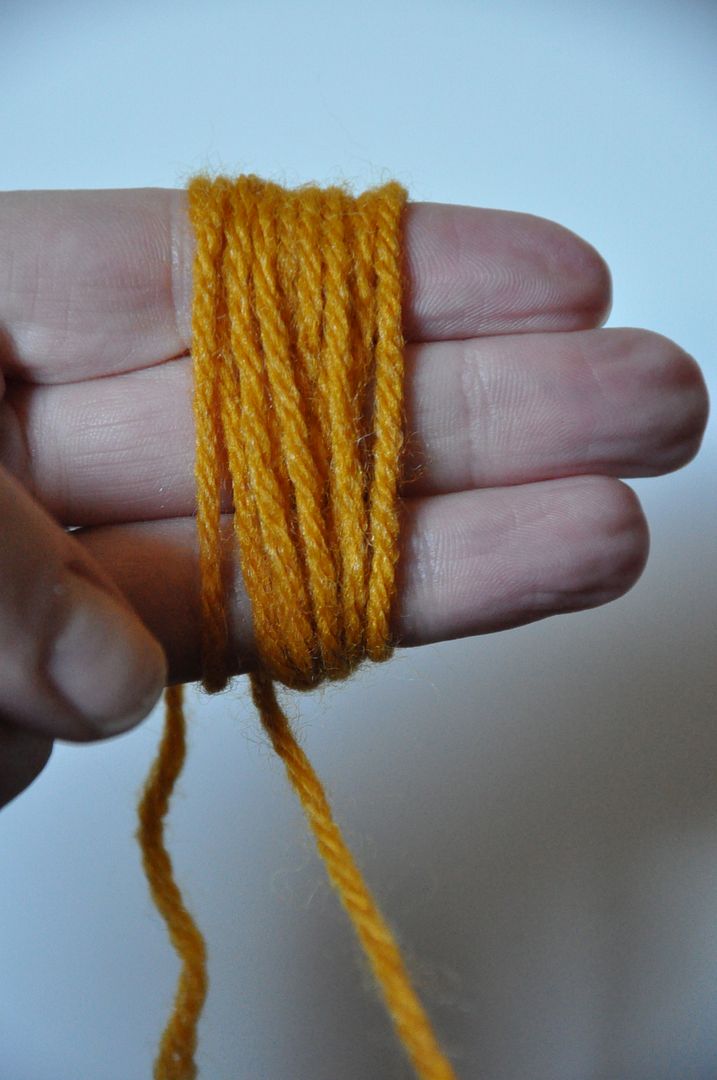
4. Holding fingers slightly apart, begin wrapping yarn around all three fingers. If you wrap too tight, the yarn will cut off your circulation. I go around with the yarn about 80 times.
5. Carefully slide the yarn off your fingers, being careful to keep the shape of the yarn, and set it on top of the piece of string you cut in step #2.
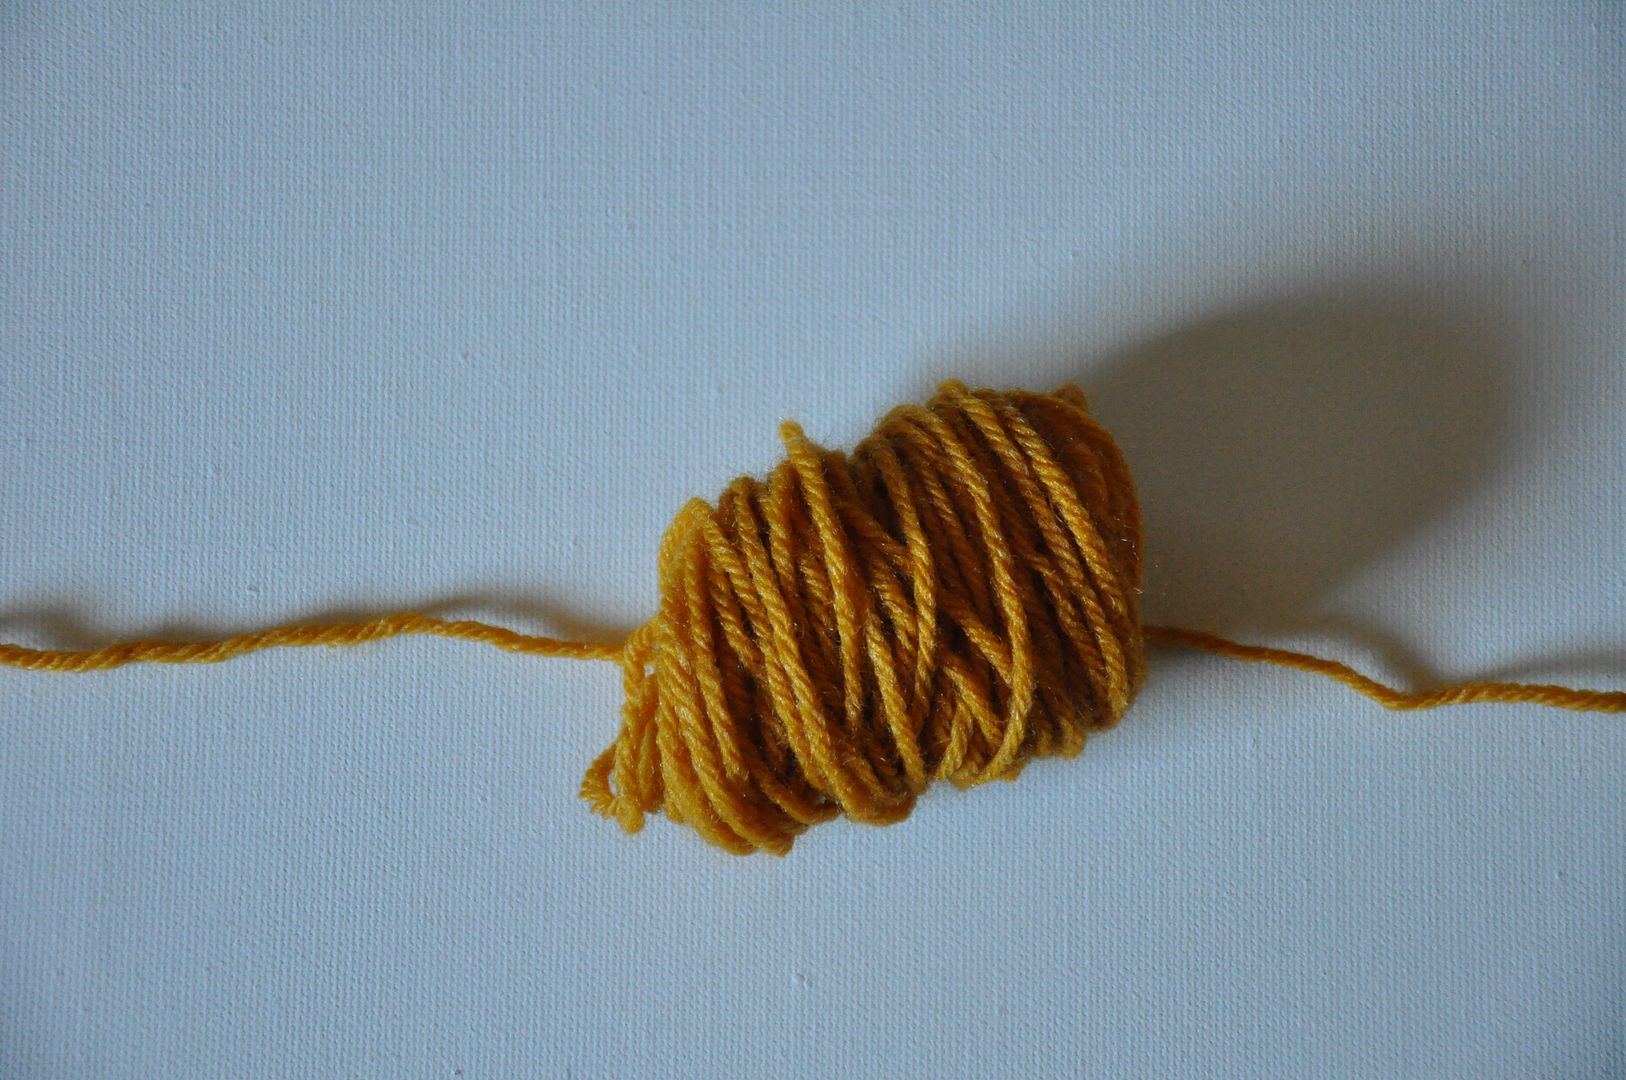
6. Tie the string around the center of the yarn and pull it as tight as you can when making your knot.
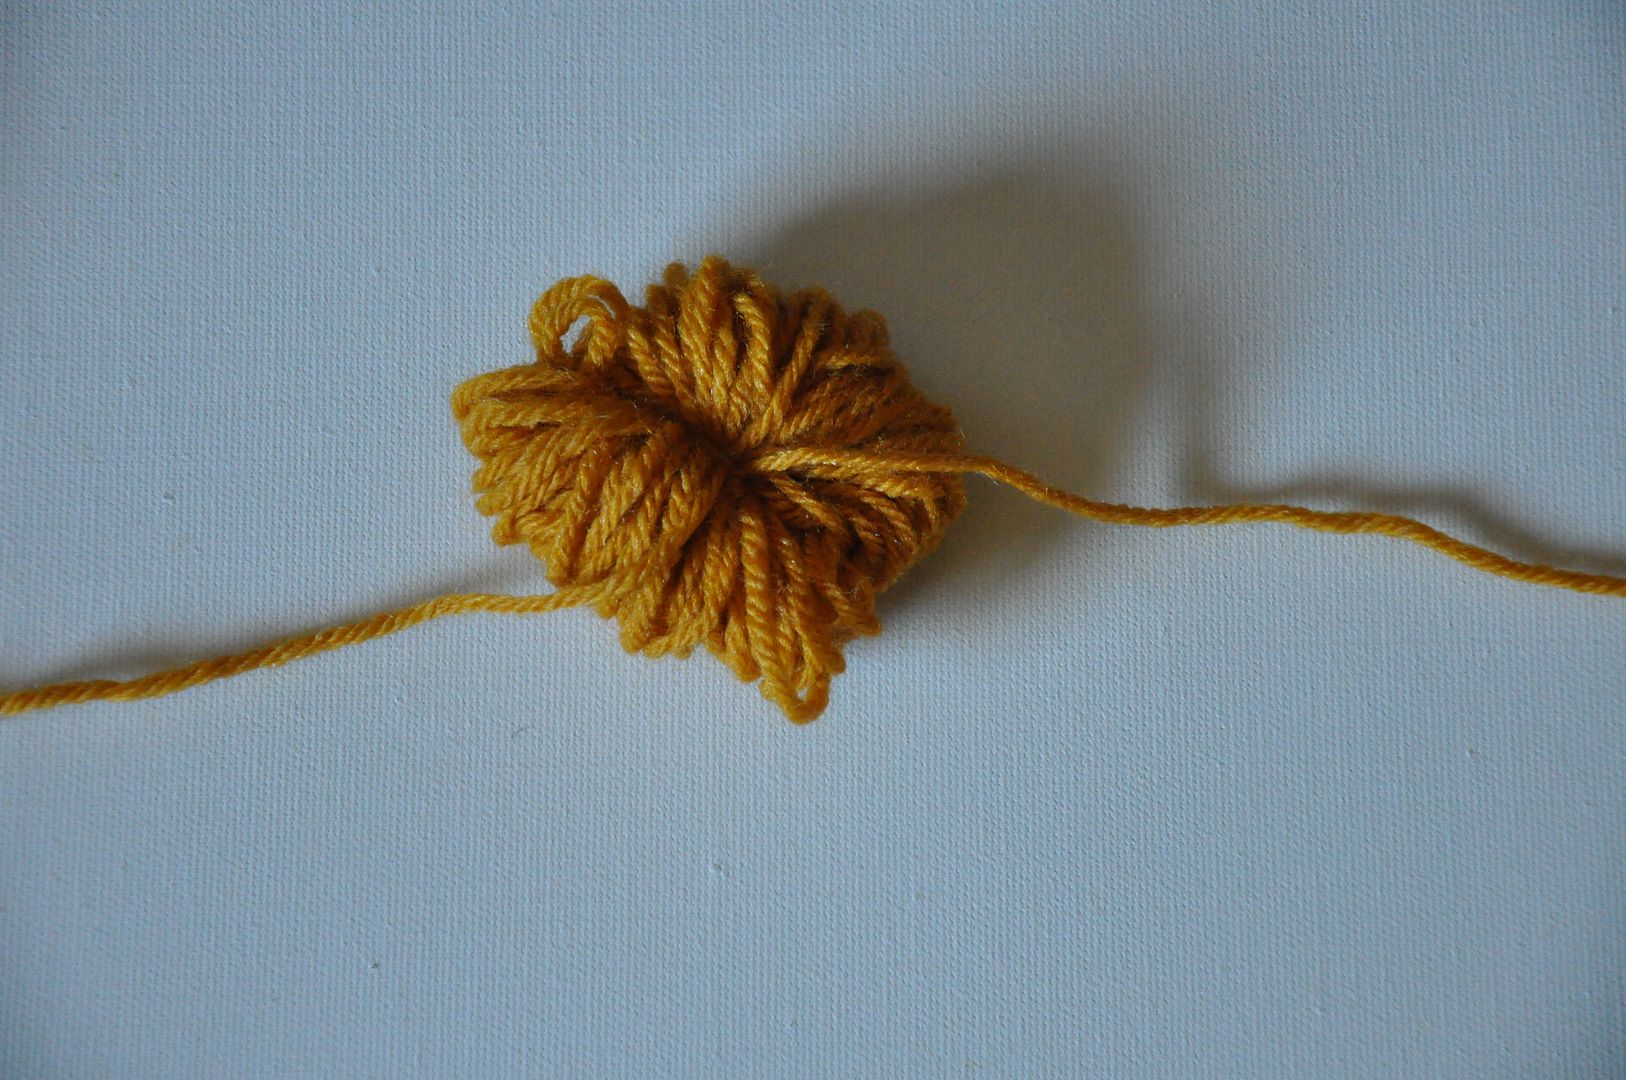
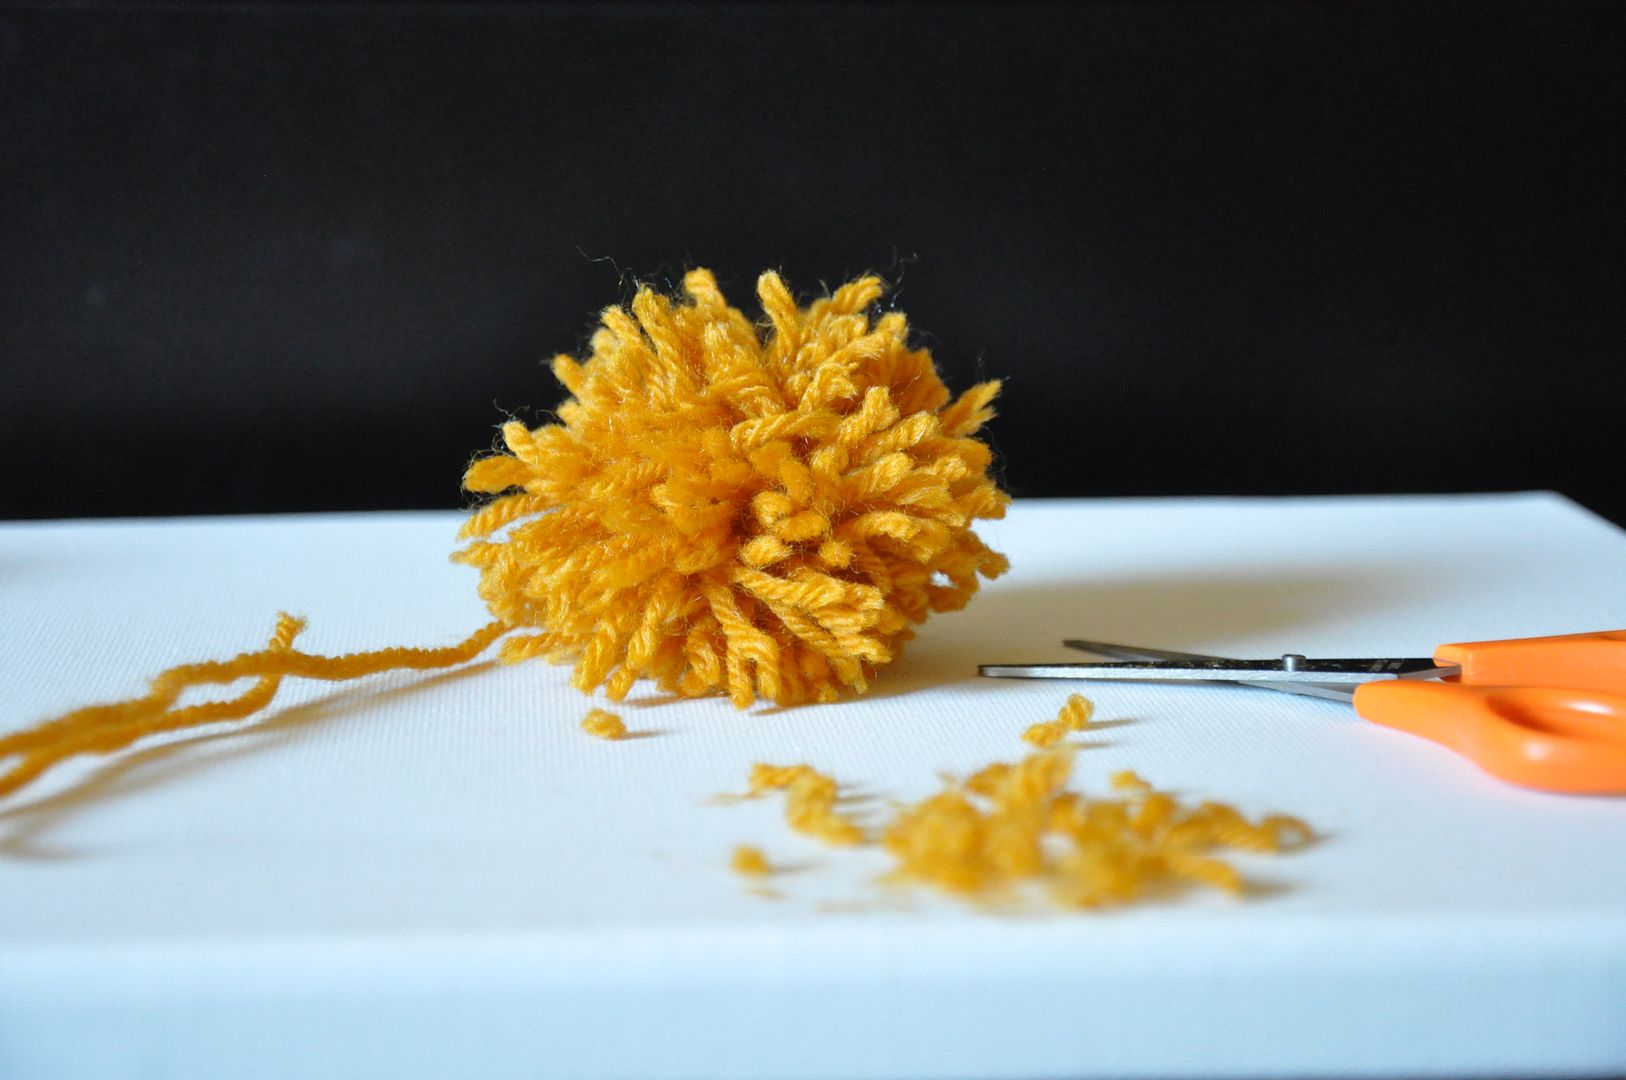
7. Trim the ends of the string and then being cutting the loops in half. There are layers of loops, so be sure to trim a little at a time (starting on the outer layer first) until all the layers have been cut and it looks somewhat like a ball.
8. Very carefully, fluff the yarn ball with your fingers and then trim any edges that look too long.
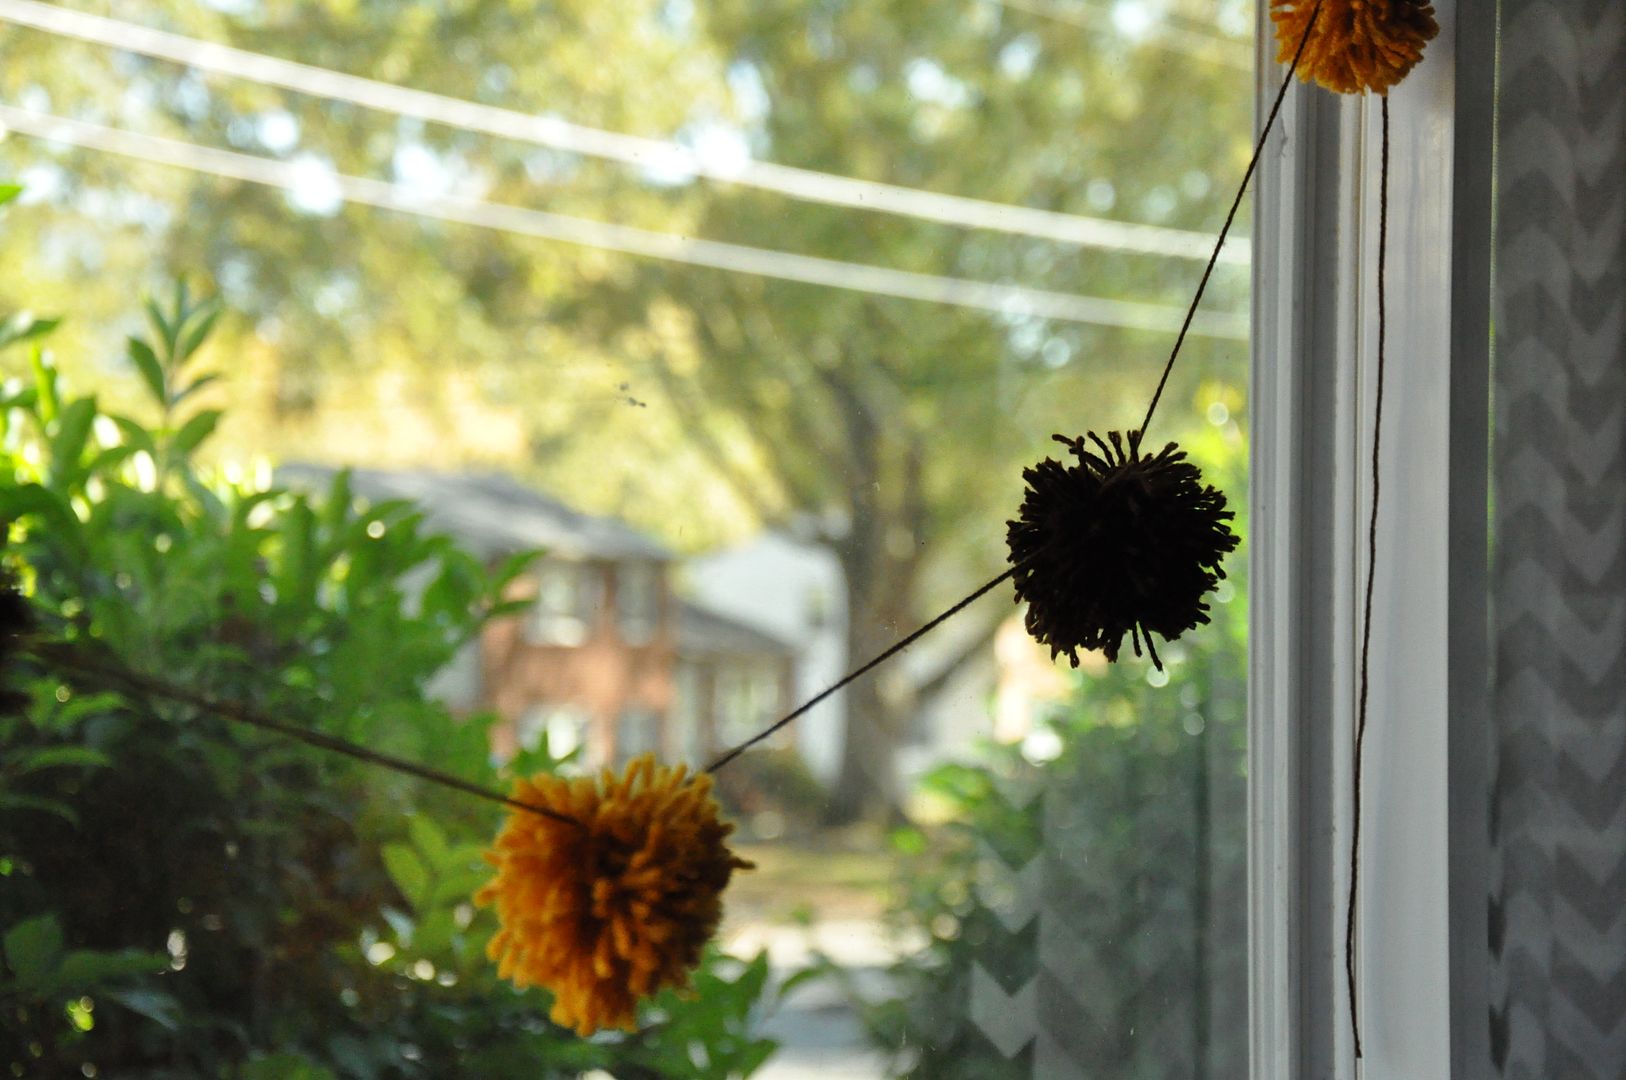
9. Tie each pom pom to a string and hang up where everyone can see it :)
I hope you enjoyed this little tutorial and that your Monday has been lovely.
Tomorrow is voting day. Eeep!
xo,
--Anna
PS - Did you make some pom poms? I wanna see! Share a link in the comments.
i am pom-pomming my heart out! i love your photo style.
ReplyDeleteThank you, you made my day :)
ReplyDelete