Showing posts with label Make It Monday. Show all posts

11.07.2011

Make It Monday: dress re-do

Hello friends :)

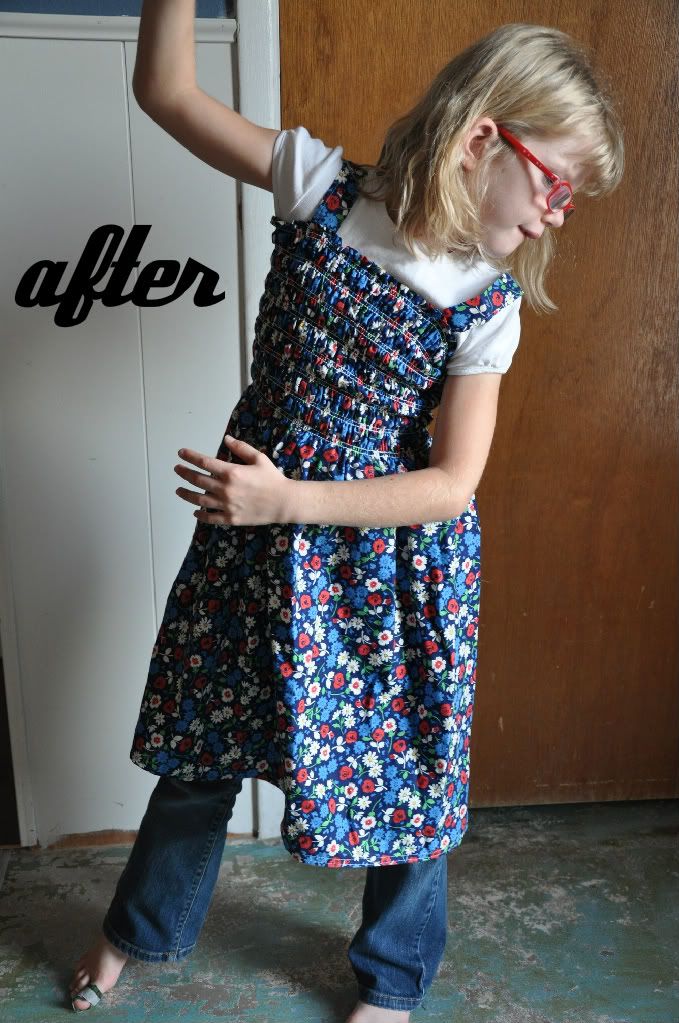
After my last post, I feel like I am on track with a lot of things & ready to share a not-such-a-downer post, ha!  So today, I will be sharing a dress re-do for a sweet little number I picked up for Tot at a local thrift shop for a buck.  Not too shabby, eh?  It is the perfect floral pattern for fall & summer, can be worn with or without tights/leggings, and is long enough that it will last her a couple seasons before she grows out of it.

  Let's get started.
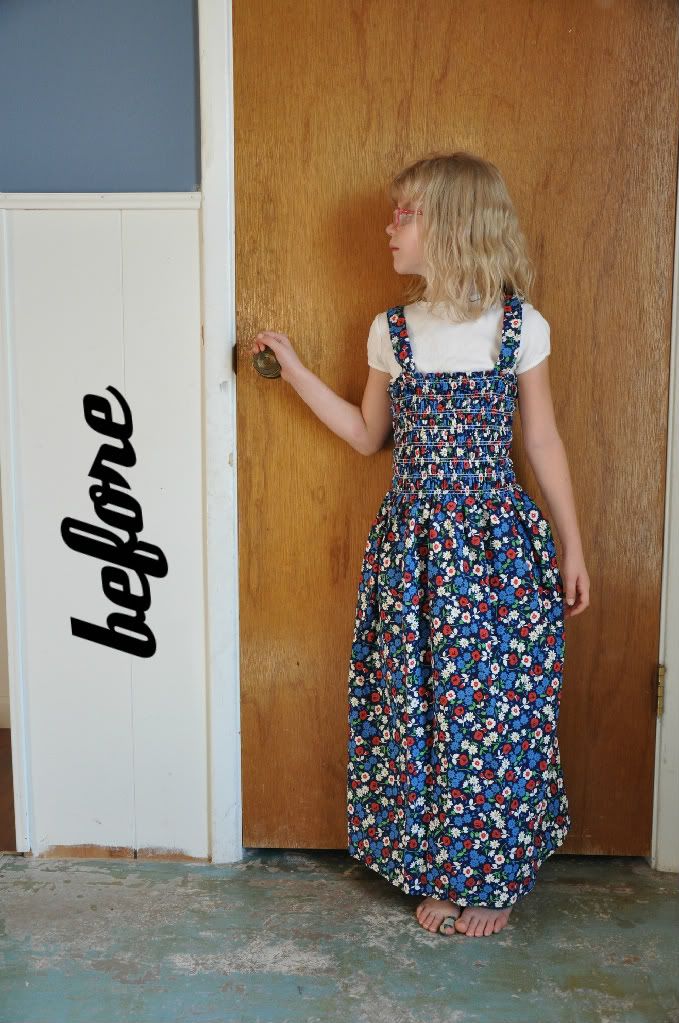


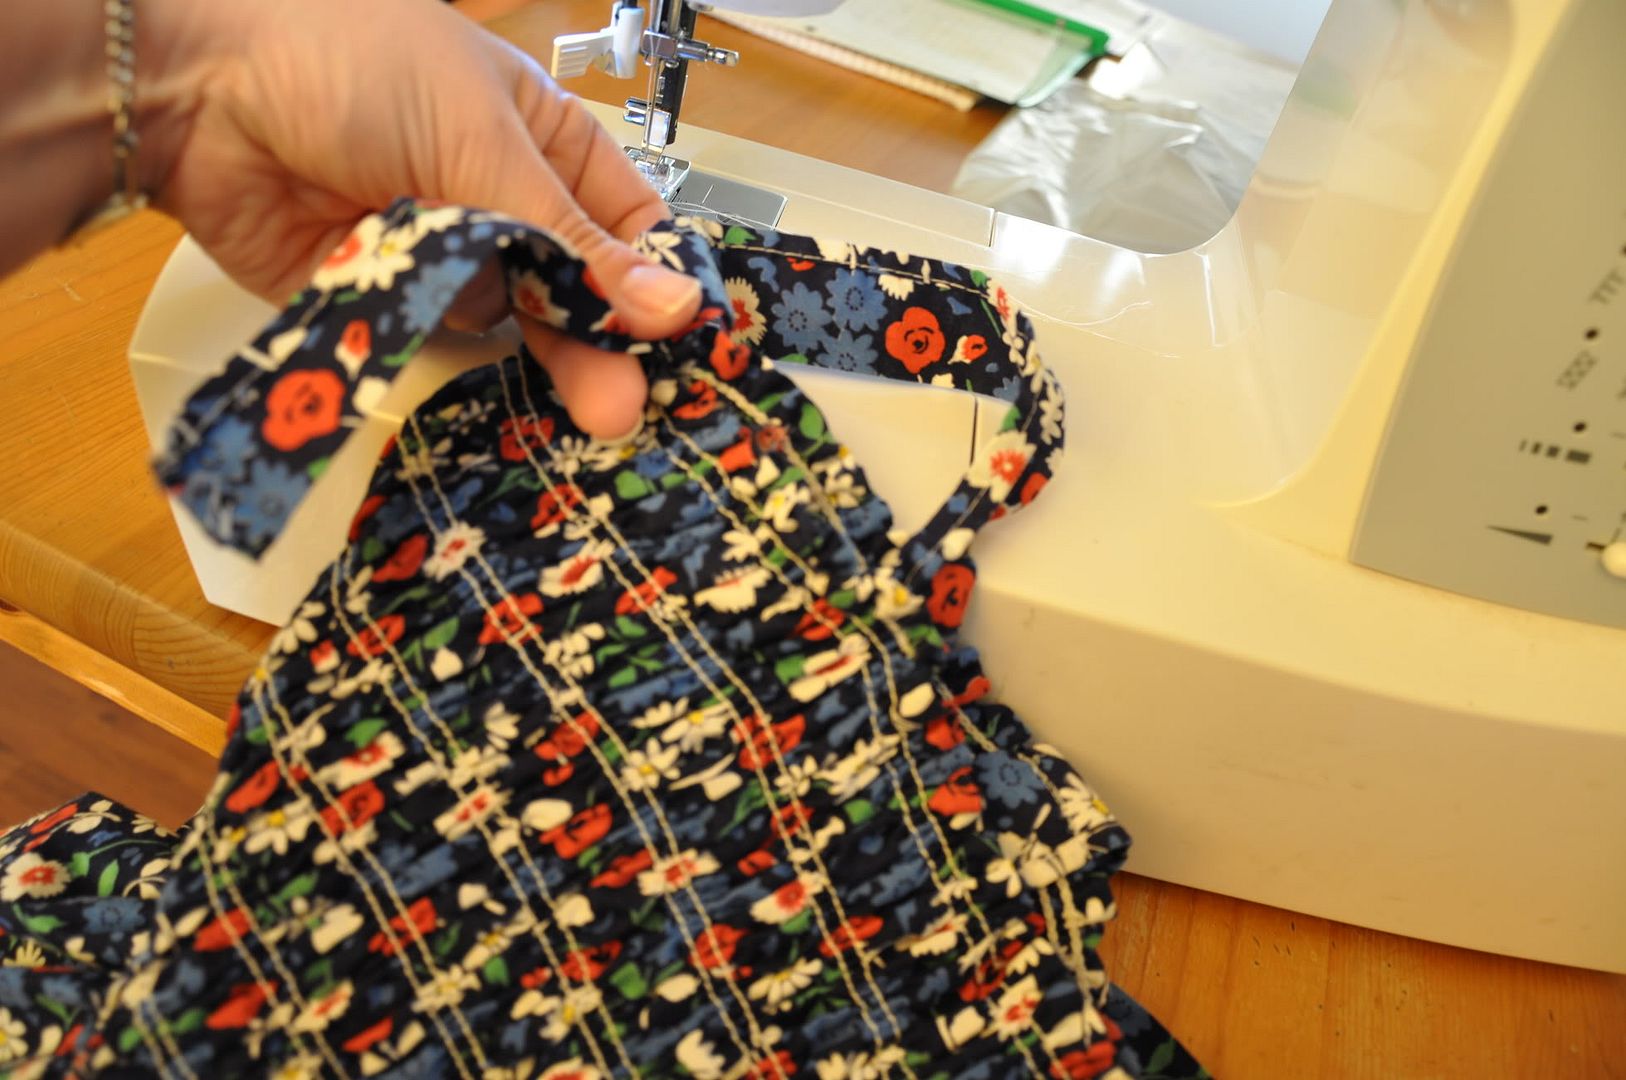
The straps on the dress were much too big.  The sewing job on the front was not well done so I ripped the seams on the front and left the back of the straps in place.  I had her try on the dress so I could pin the straps exactly the right length before sewing them in place.


I didn't cut off the excess - just in case she has some crazy growth spurt and the straps need to be lengthened.  We just tucked them behind the bodice of the dress and they stay hidden perfectly.

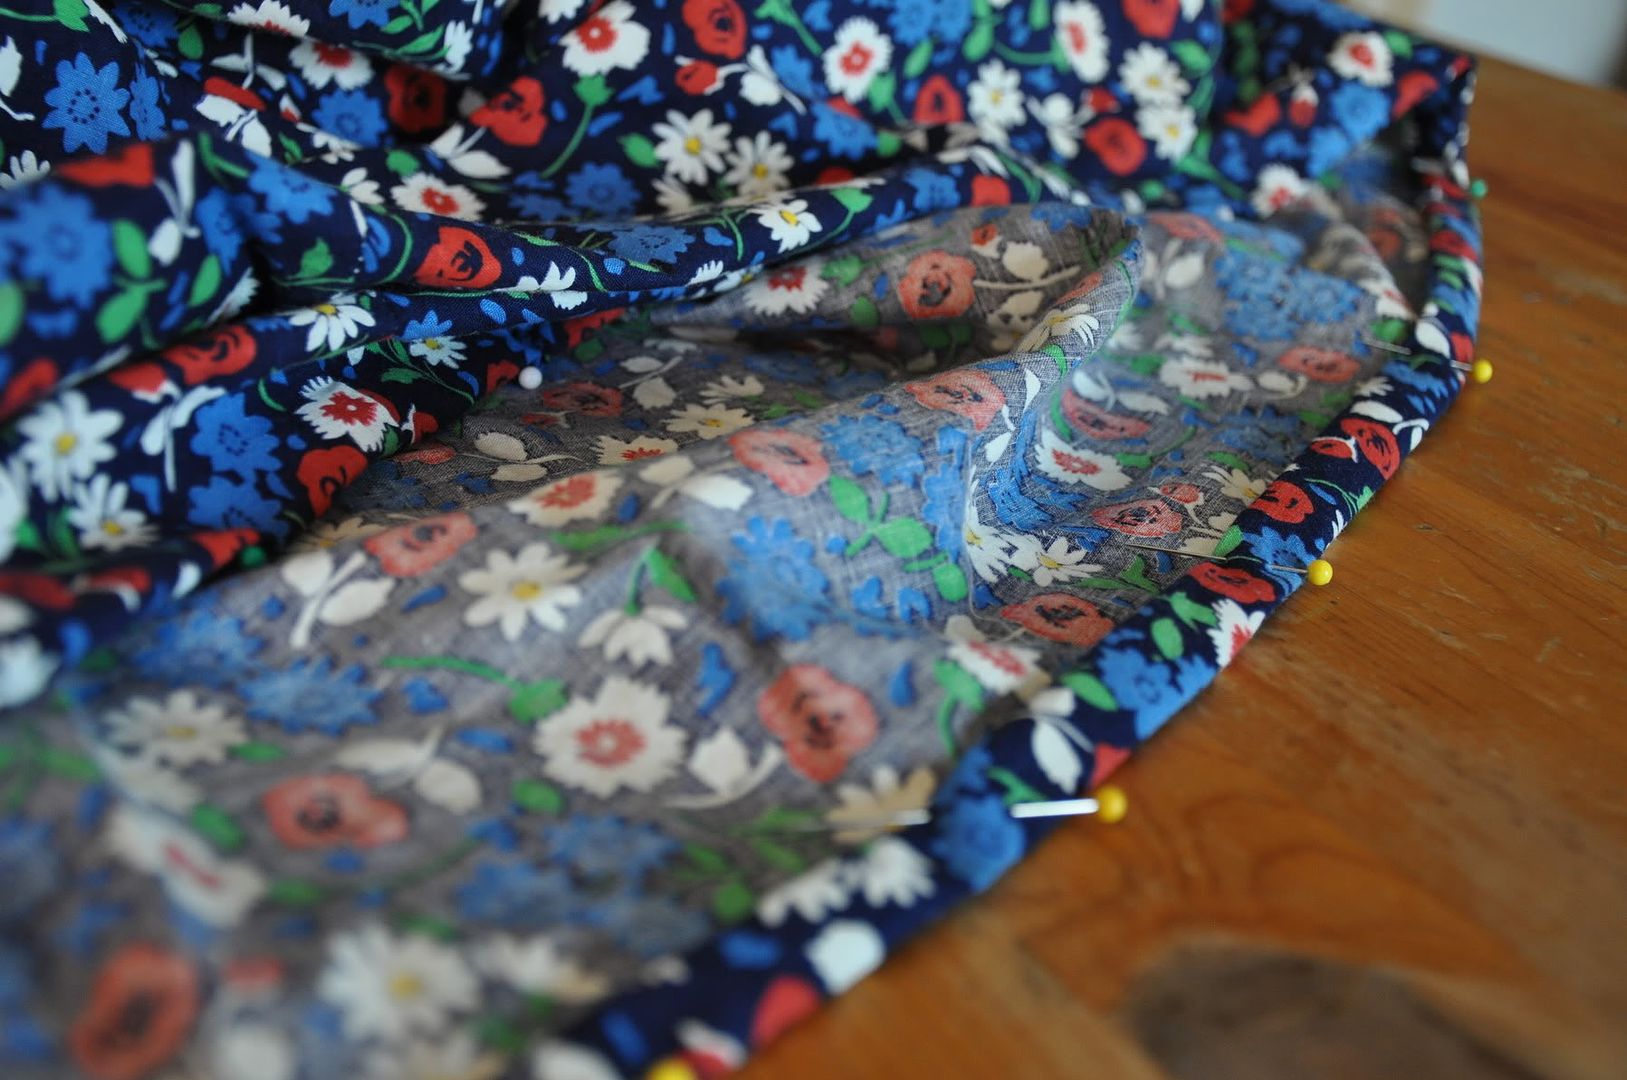
The skirt of the dress was much too long - down to her feet.  I wanted something that would fall just below her knee, allowing her room to grow.  While she was trying on the dress, I placed a pin at the length I wanted the skirt.  Then I laid the skirt out flat and cut it straight across.  You can use a ruler if you like but I just eyeballed it.  

Then I folded the end in 1/4 inch and folded it in again, pinning in place as I went.  Then I sewed a straight stitch at the top of the hem and the bottom.  I wish I had a serger.  But for this project, a straight stitch will do.

It only took me an hour to complete this little project - and that includes taking time to help with math homework & make dinner.  Mothers are fabulous multi-taskers.  And now Tot has a cute little dress.
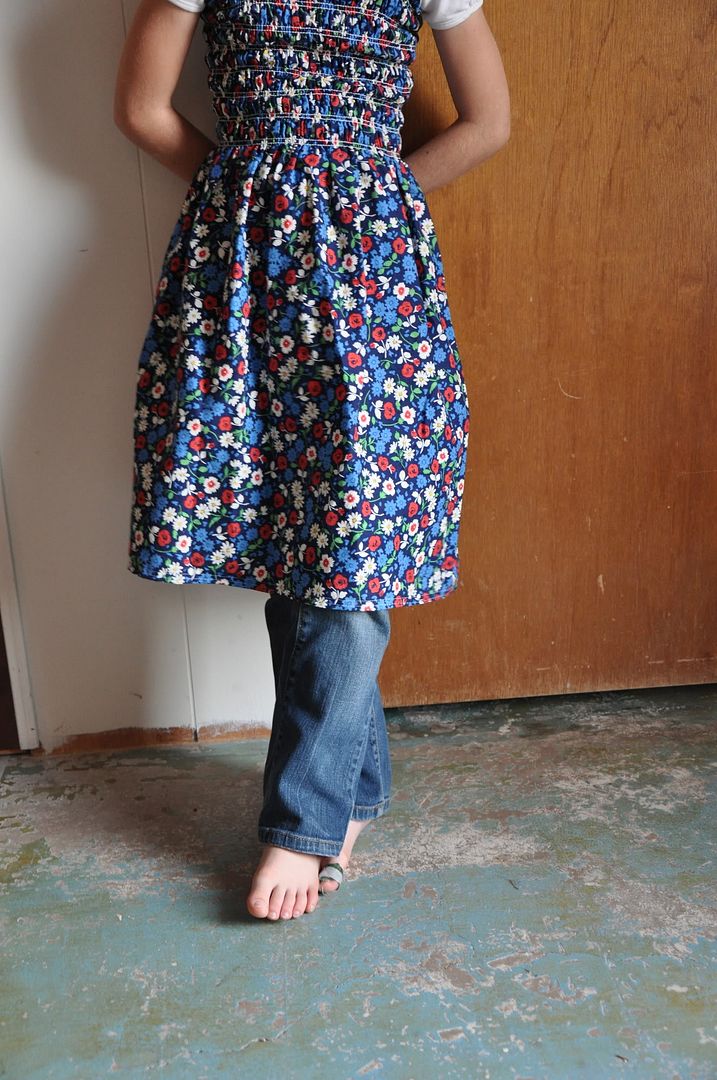

Happy Monday.

xo,
--Anna


10.16.2011

Make It Monday: kitchen cupboard makeover

Hello there.  I am excited to share today's tutorial with you - because it means I FINALLY have something in my cabinets besides empty spaces.  See, when we remodeled our kitchen, our cabinet guy said it would be much cheaper to take the cabinets to a glass store & have them put in the glass than to order them with the glass already installed.  Well after the kitchen re-do was done, we were out of money & so the glass in the cabinets would have to wait.  And wait.  And wait.  

Fast forward about 2 years (the present time) and we have to put our house on the market because the Mr. got a new job (eek!).  We knew we had to fill those cabinets with something and that it had to be cheaper than glass.  We found decorative metal sheets at The Home Depot (in the wood section) and knew we had found our solution.

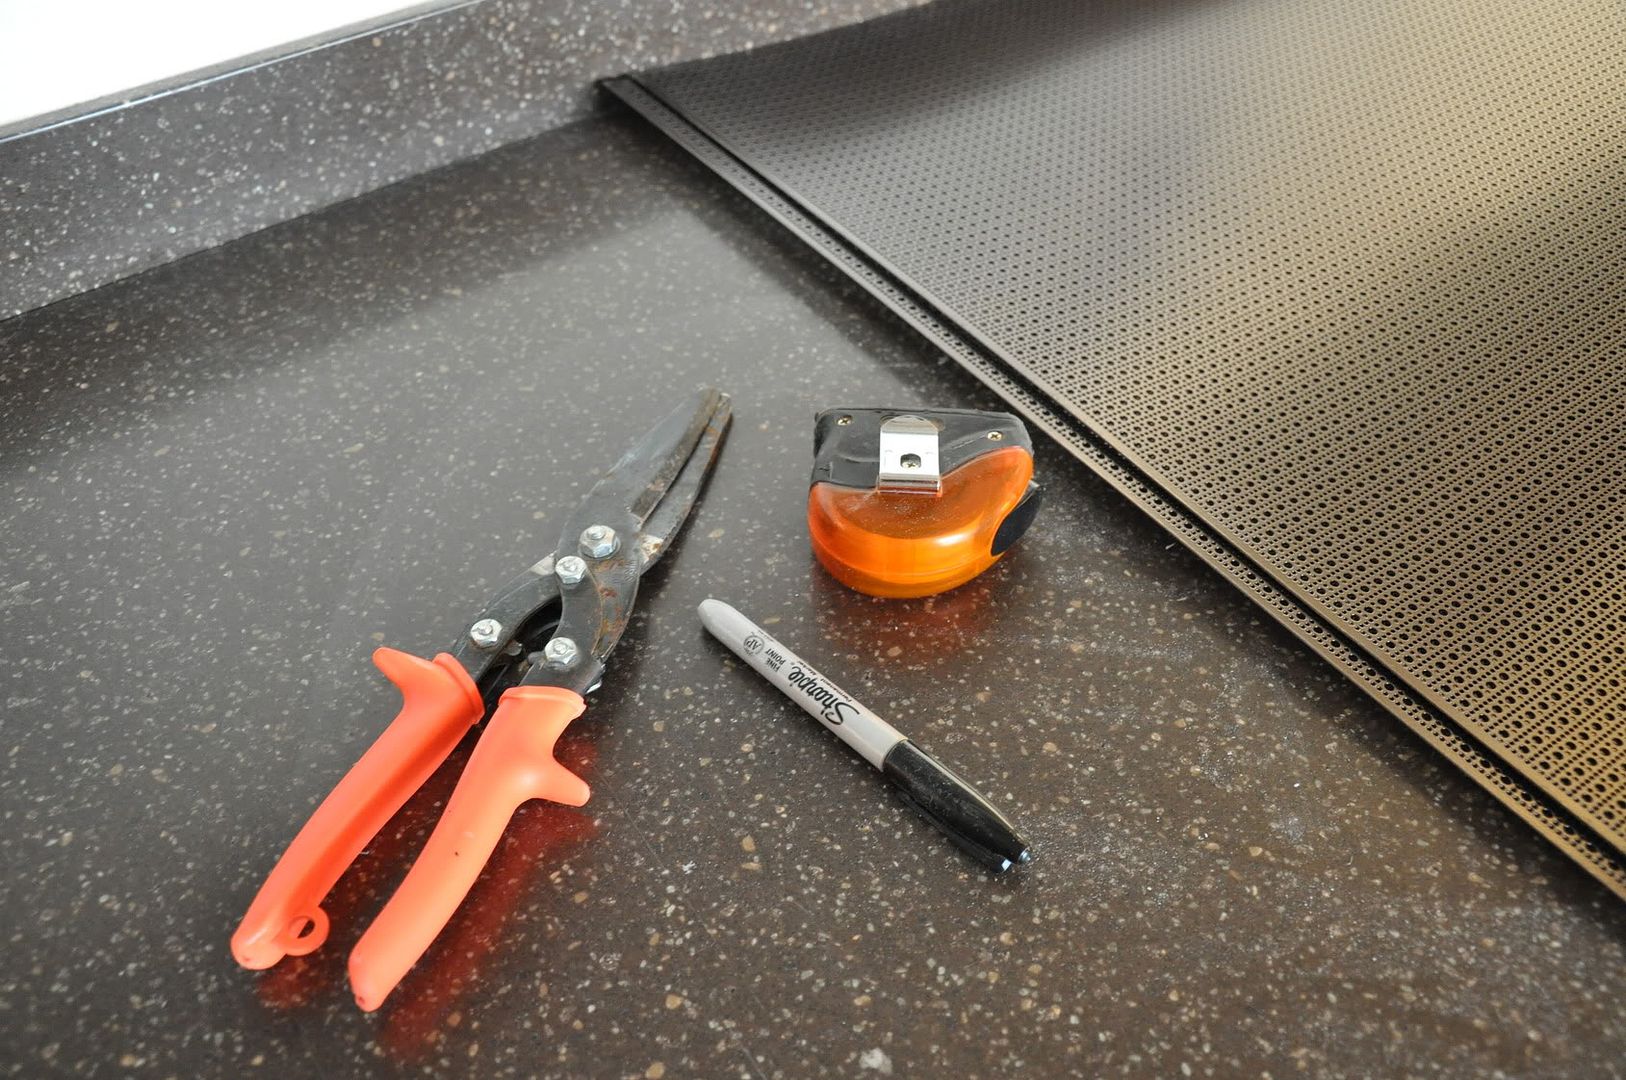
So let me tell you how to liven up your kitchen cabinets in a super cute way.  First, you will need metal cutters, a measuring tape, a decorative metal sheet from a hardware store, some flat push pins (not pictured below) & a black sharpie.


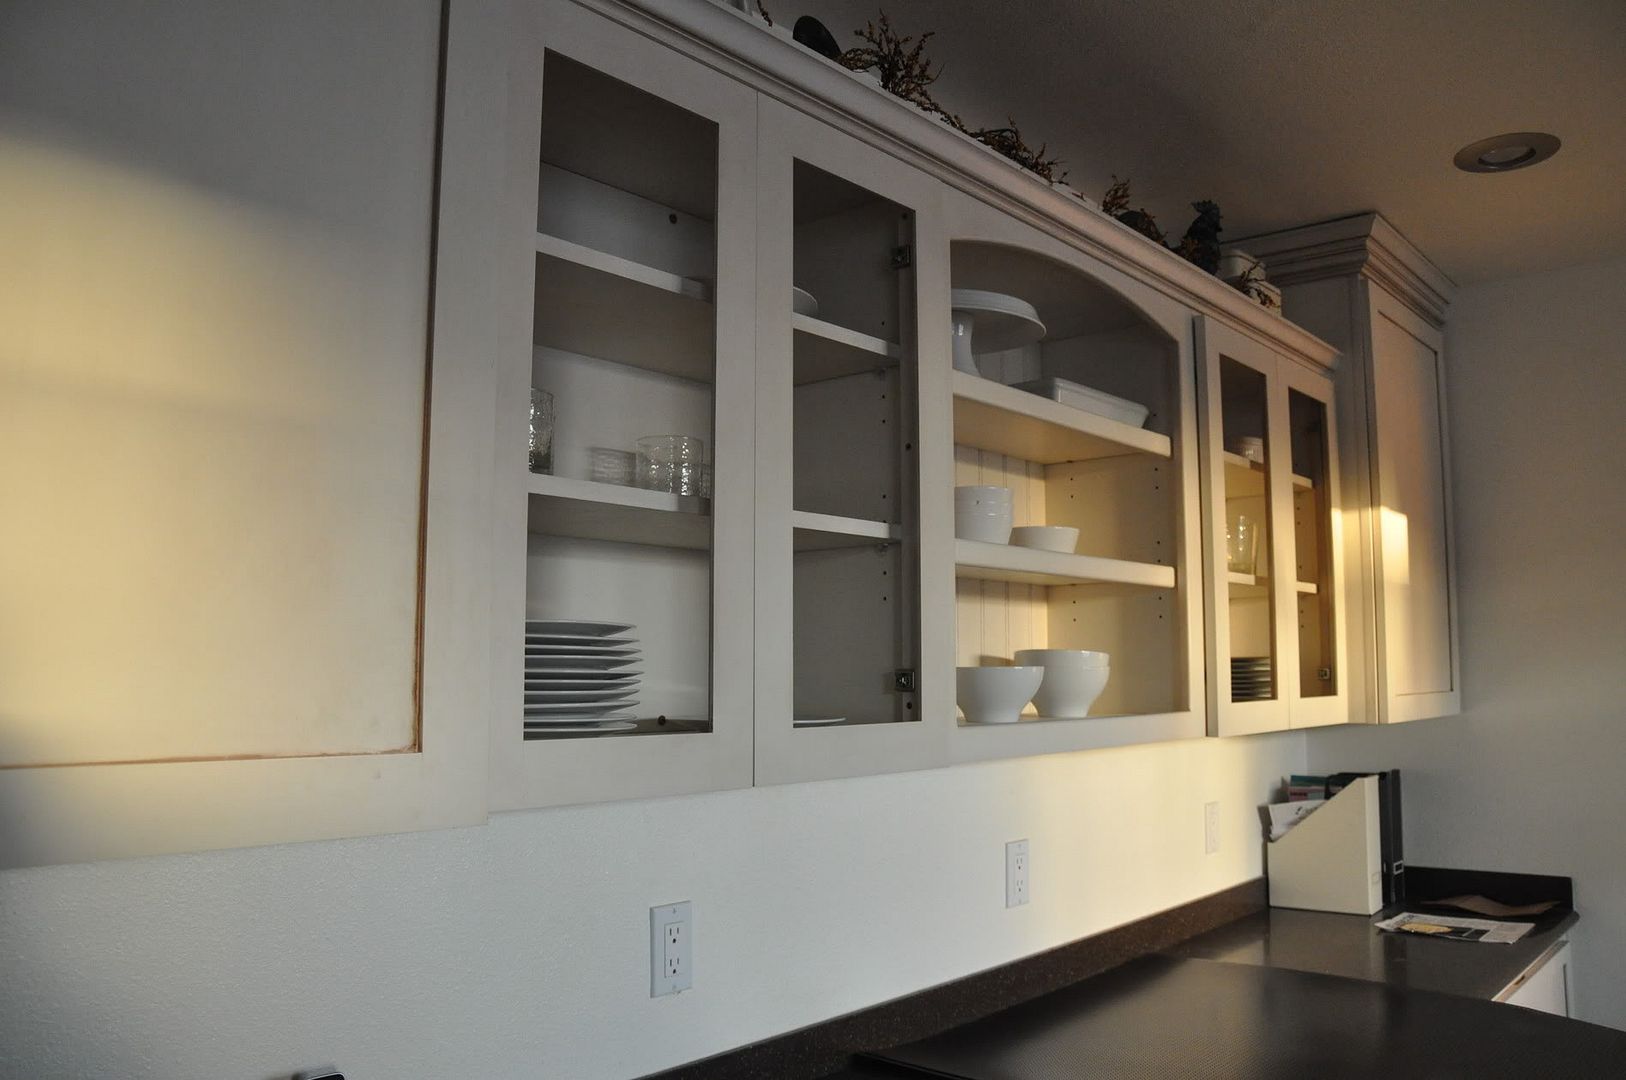
So here is what our cabinets looked like before.  Sad, I know.


See why they needed prettied up?  It was super easy.  I just measured the cabinets with my measuring tape & then drew those same measurements onto the metal sheet using the sharpie.  If you want to make your lines super straight, use a t-square or a flat ruler.  Cut the metal and insert it into the back of the cabinet.  It might be necessary to trim a little here & there to get a good fit.  To make sure it stays, push a pin into each corner at an angle.  If you want to make them more permanent, you could always glue them in.  That's it folks.  You're done!

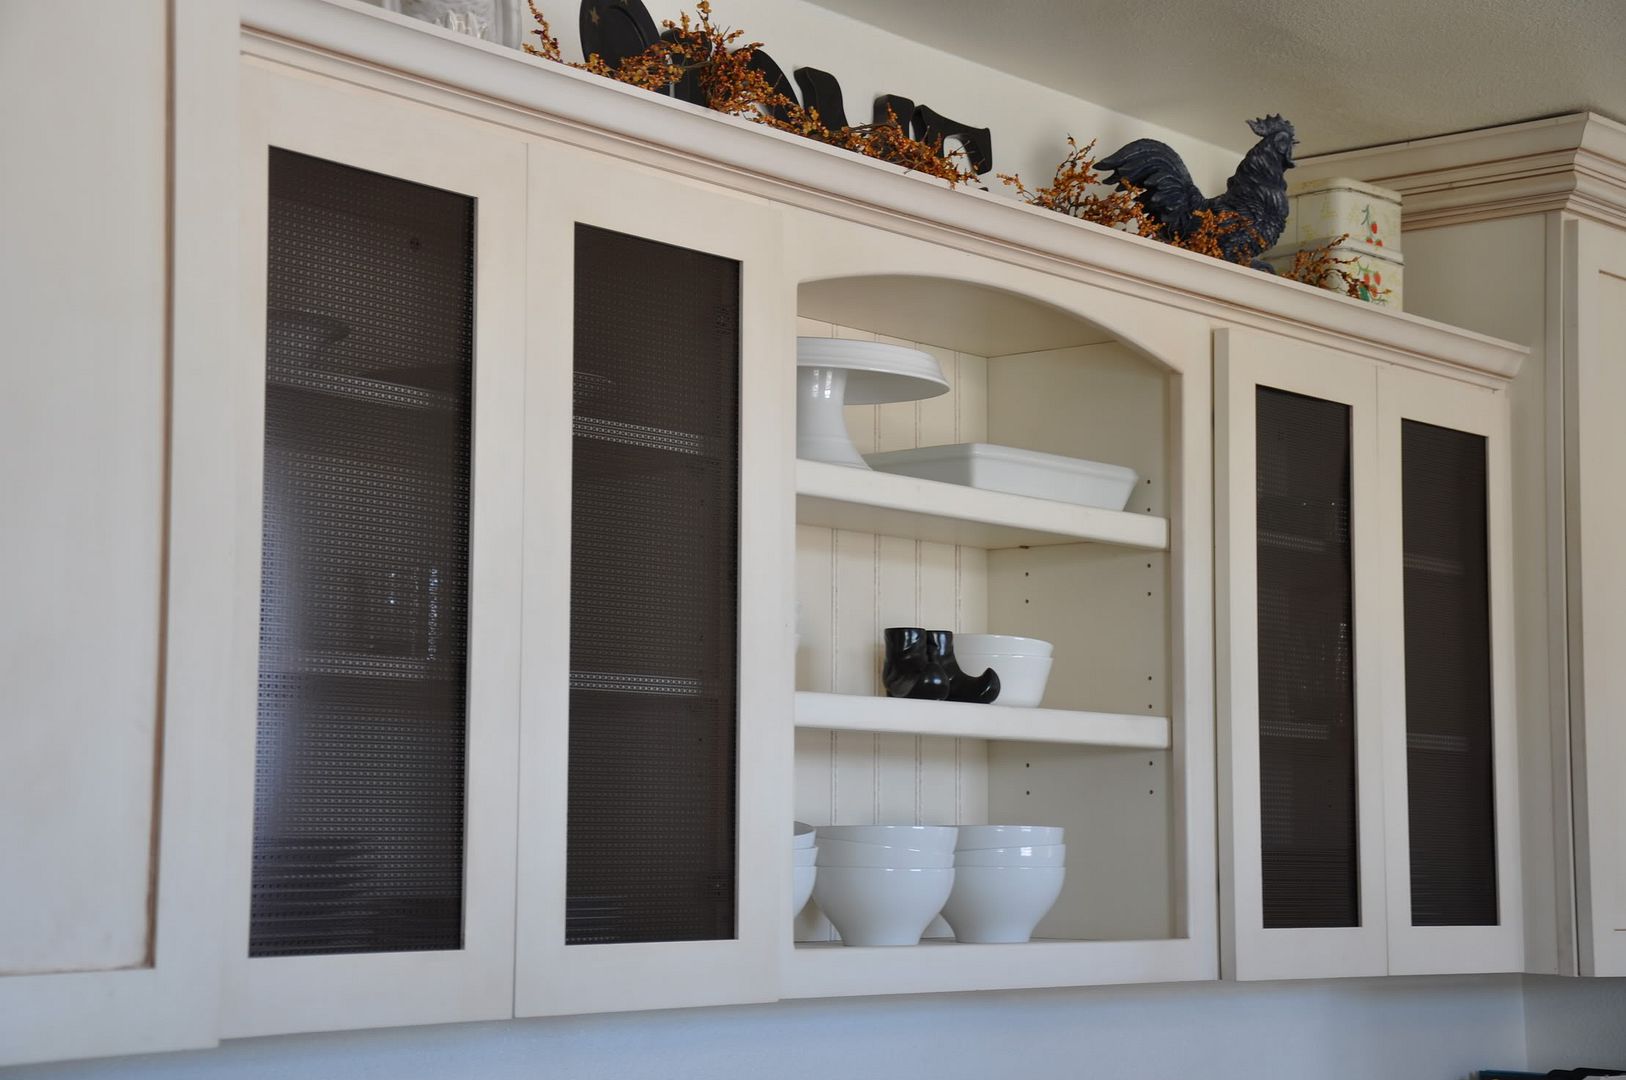
Now look at how fancy schmancy our cabinets are:


Obviously, I decorated for Halloween/Fall in-between the before and after photos.  But seriously, isn't this cute?  We are definitely doing this in our next house.  Not only is it easy, you'll end up with cabinets that no one else you know has.  And they'll think your cabinets are super cool.  And who wouldn't want that?

Happy Monday,
--Anna

10.03.2011

Make It Monday: old jeans//new jeans

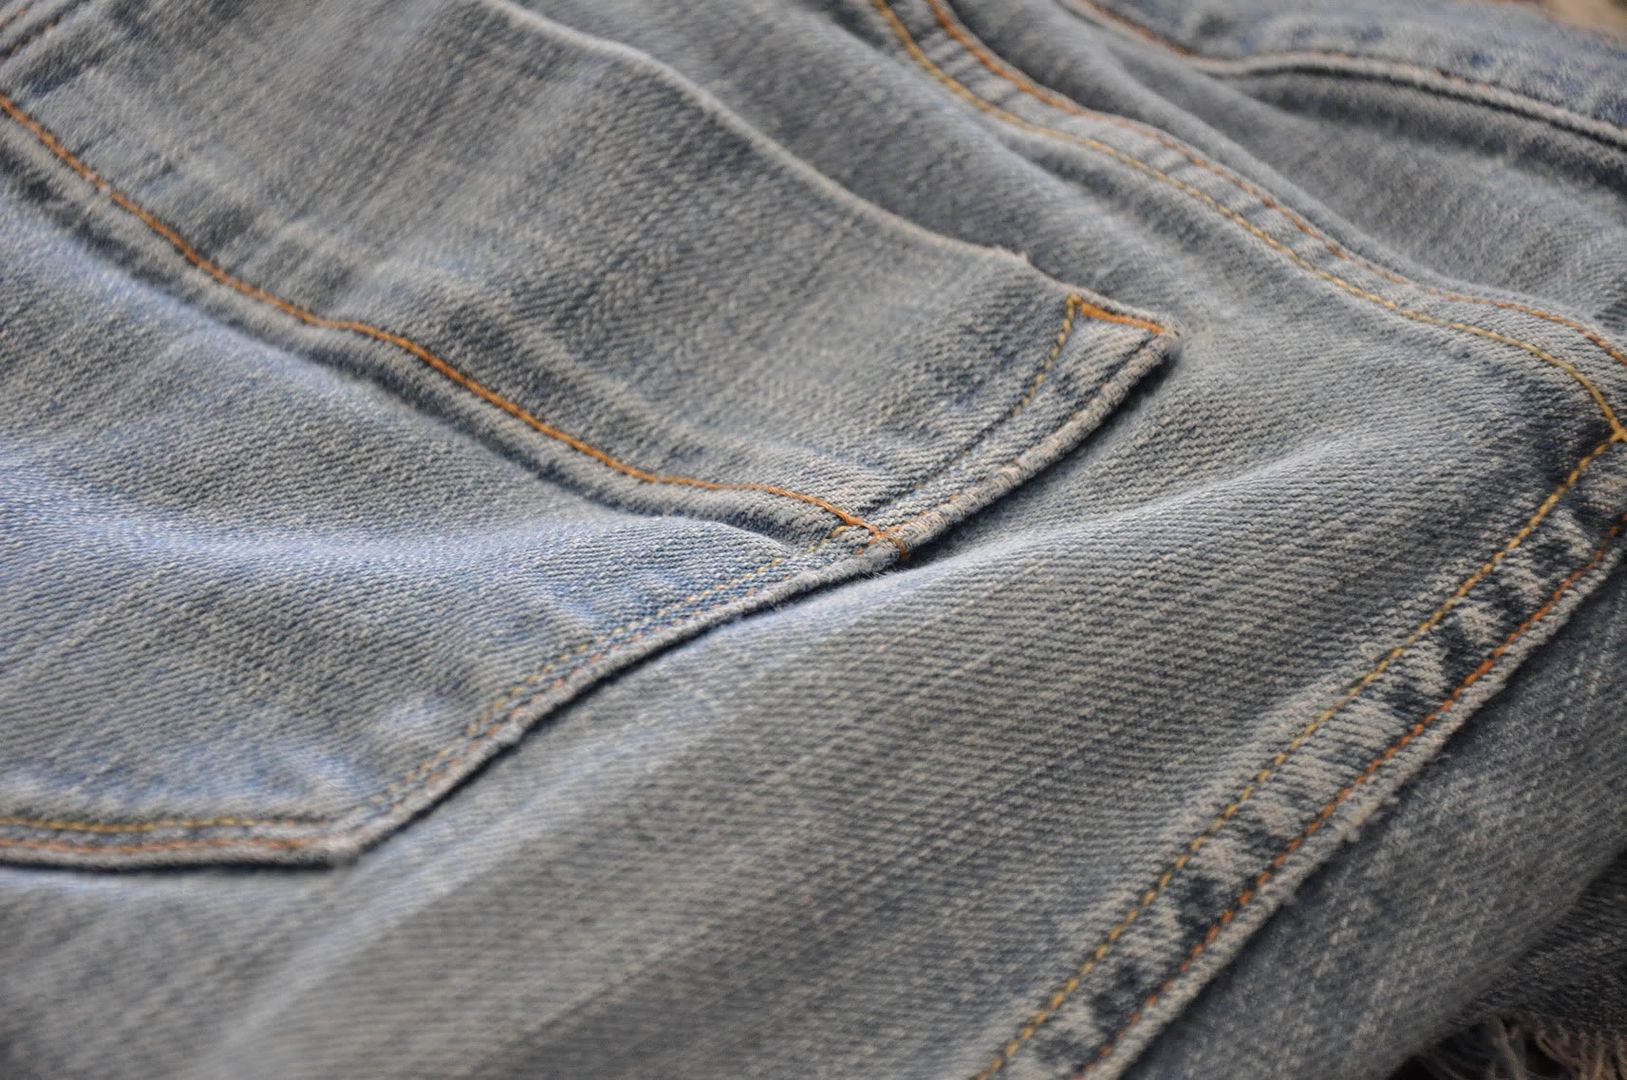
I have a pair of Sweetheart blue jeans from Old Navy that I love.  I love the fit, that is.  Not the color.


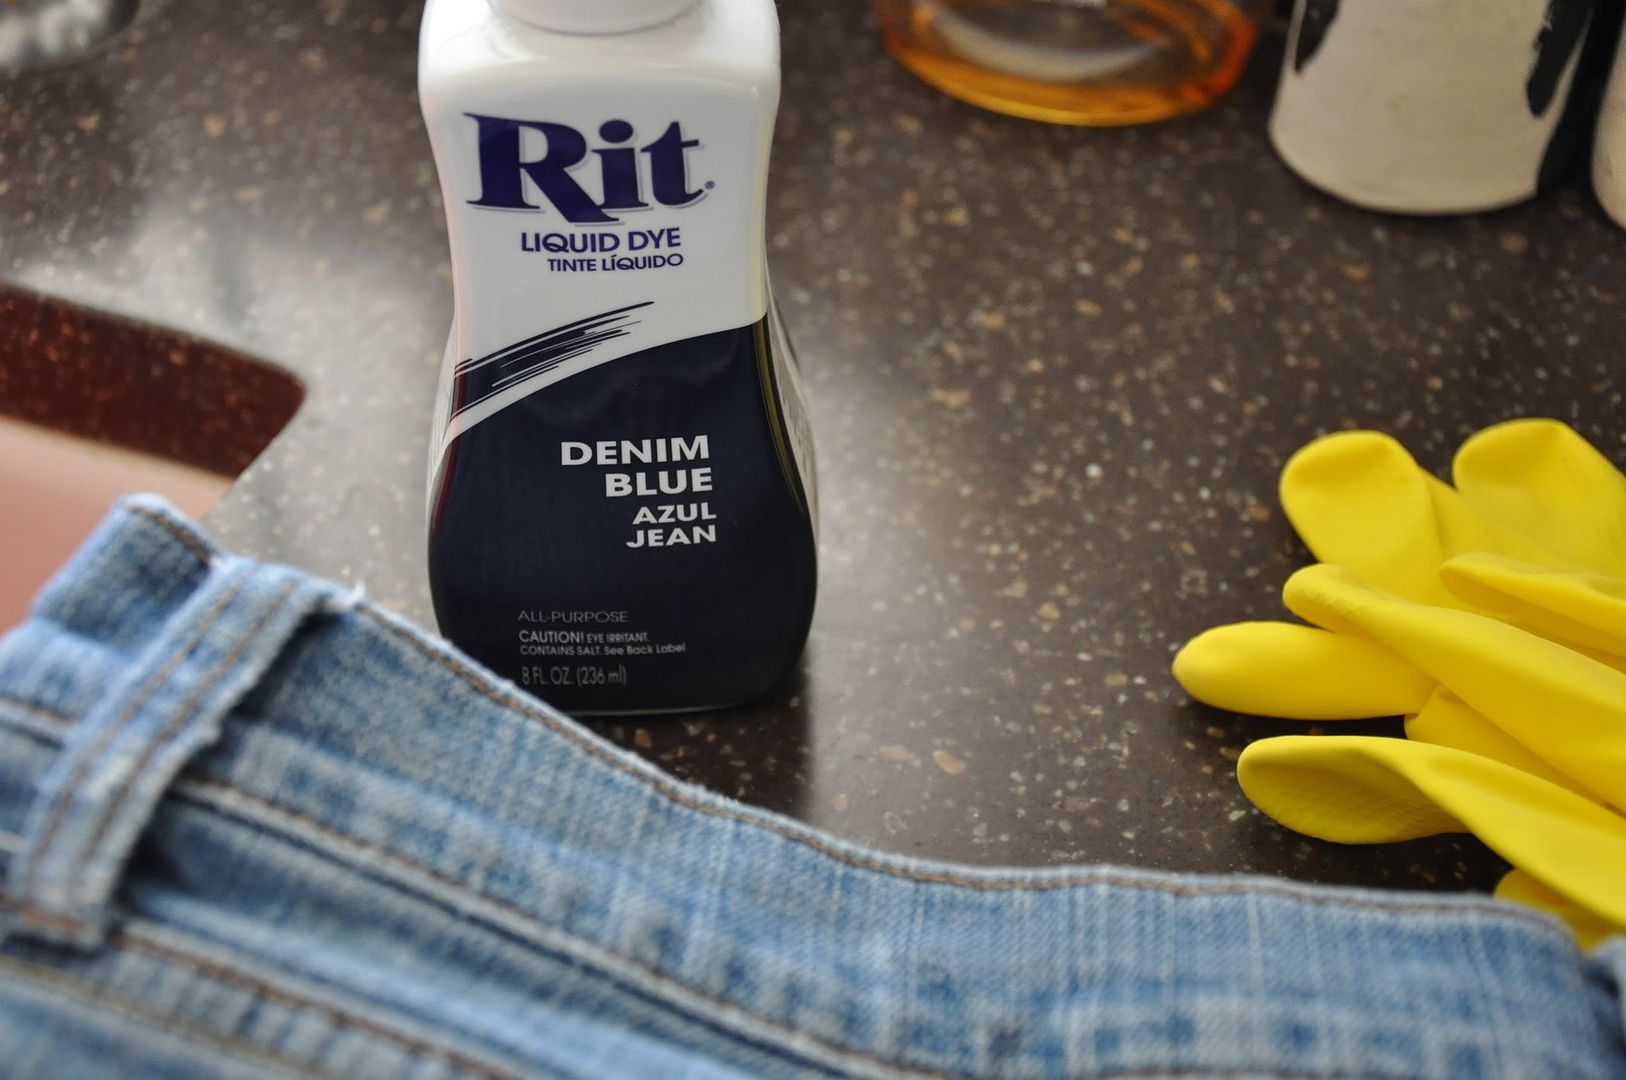
So I decided they needed some freshening up.   Denim Blue RIT dye from Walmart would be just the thing to deepen that faded old blue.  


I decided the best place to do this project was in my kitchen sink because it is big & deep (and I wouldn't have to be hunched over the whole time).  The packaging does say that it will stain cracks in porcelain (the material my sink is made of) so I was sure to wash any stain down immediately.  

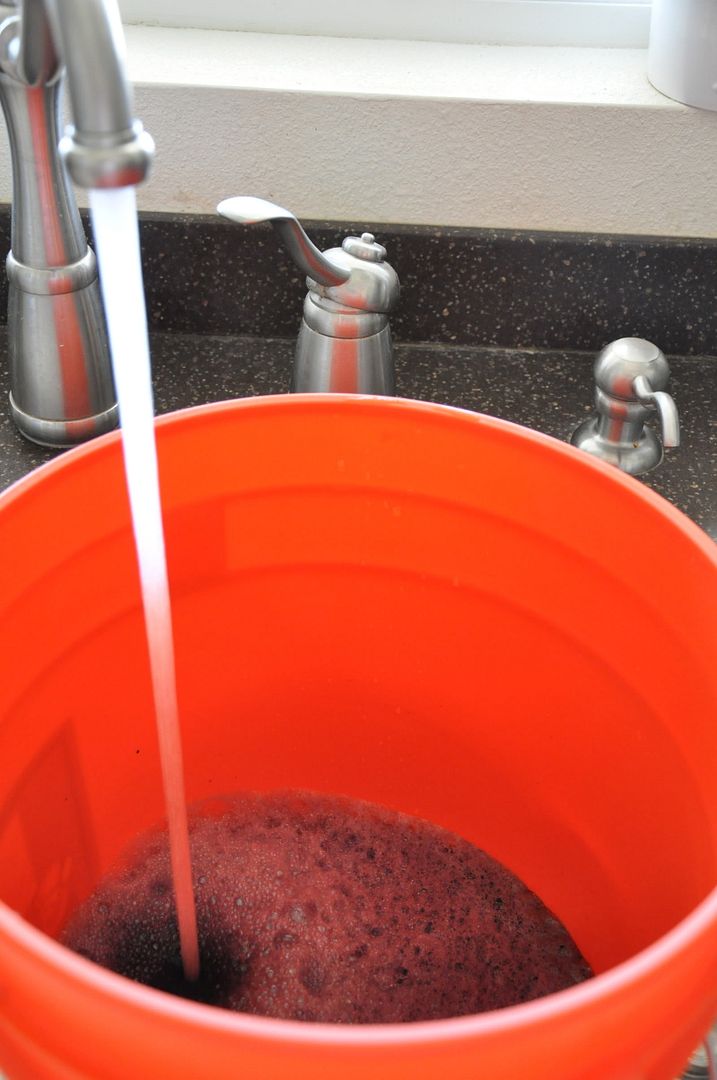
I filled up a bucket about half full with water that was as hot as I could stand to touch.  I poured in the whole container of dye while the water was running and poured in a cup of salt (per the container's directions).  Hot water and salt allow the fibers to expand and the color to set better.  The dye also says to stir your project with a wooden spoon.  I don't have one.  And since my jeans are a larger project, I donned a pair of rubber gloves and swished the jeans around in the bucket the entire time.


I left the jeans in the dye bath for 35 minutes.  It took me an equal amount of time to rinse out all the dye before throwing the jeans into the washing machine.  Be sure to rinse with cold water as this will allow the fibers to shrink and the color to set.  Some dyes take longer to rinse out than others.  Reds usually take the longest.

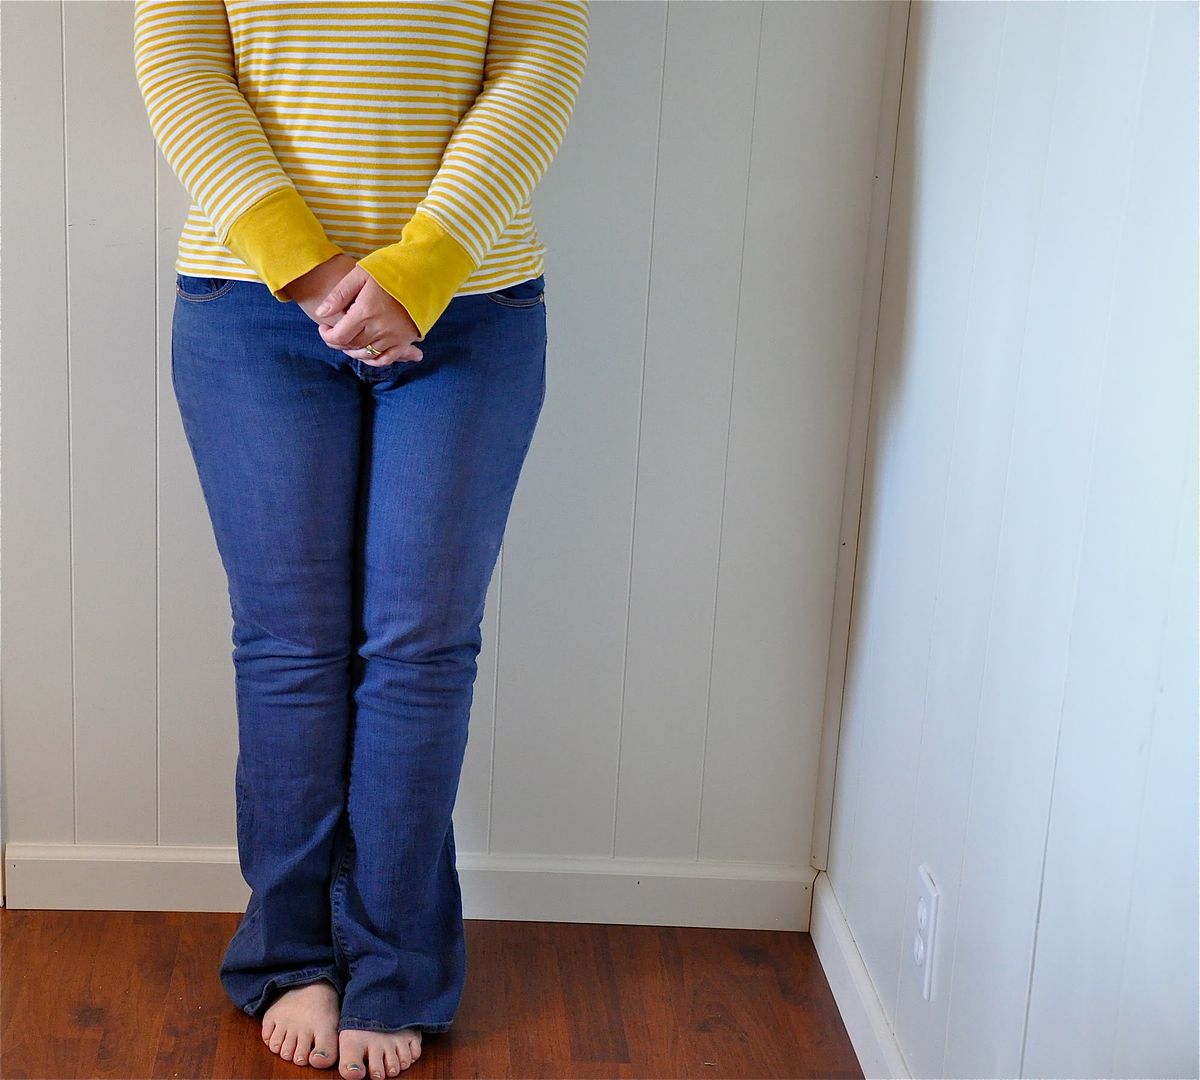
And now my blue jeans are a blue I love.  


This project made me miss the process of fabric manipulation - something I did in college.  I really want to do more and am already searching my closet for more dying possibilities.    A project like this is lots of fun, easy to do and can bring a completely new life to something rather drab.    So go dye something - you'll be glad you did.

Have a lovely day,
--Anna

9.06.2011

Make It Tuesday: bed makeover

I've been stuck in a whirlwind of packing boxes & taking photos of the house for the realtor, remodeling our main bathroom, setting aside items for our yard sale this weekend, and trying to juggle life inbetween. I finished packing up most of the kids' rooms and am kind of in love with how clean they are right now.  In fact, I kind of don't mind if what I've packed already doesn't come with us.  I know they'll miss their stuff, but I sure won't.  Is that mean?   So amongst all the business, I found time to spray paint the bed frames we bought at a consignment shop forever ago for our girls.  There were two of them, they were the perfect size (twin) and they were cute.  Just a little worn out & white.  But the DIYer in me knew something could be done to change that.

The Mr. suggested black & I loved the idea.  So we headed over to The Home Depot for some glossy black spray paint (a much better choice since we had lots of nooks & crannies to get paint into on the posts).


Years ago, my grandma gave me the blanket that my grandpa had on his bed before he passed away.  I remembered that she had an exact match on her on her bed when I was a little girl.   But hadn't used it in years.  So I got brave and asked her for it & she was more than happy to give it to me.  Now my girls have them.  I love that they've inherited a small piece of two very special people in my life.


I looked through my photo archives & can't find the "before" photos I took.  I hate it when things mysteriously disappear.  Just pretend you saw photos of a plain old scratched up white bed frame that needed some serious lovin.  

Have a lovely day,
--Anna

8.28.2011

Make It Monday: Tame Sweater Ruffles

I bought a cute sweater at DownEast Outfitters a summer or two ago.  I fell in love with the ruffles & couldn't wait to wear it.  But after the first wash, it was a disaster.  The pretty ruffles were a crazy mess.  And so it got thrown into my closet, lost in the pile of other sweaters that had no ruffles on the top shelf.  And I forgot about it.  Until I cleaned out my closet in order to purge old clothes that were donation worthy.  I saw the sweater & it practically begged me to wear it.  Okay, not really, but it just wouldn't be right to only wear something once since money absolutely does not grow on trees around here.  All it took was a little DMC embroidery thread that matched the sweater perfectly, a needle & scissors.  I simple used the thread to tack down the ruffles, but still allowing them to ruffle enough to be cute.  I knotted each stitch on the inside of the sweater so no one can see them.  Now my ruffles are tame & lovely.


The Mr. says my bag looks like it is smiling.  Yes it does.  Yes it does :)


Have a lovely day & go tame some wild ruffles in your wardrobe.
--Anna


7.18.2011

Make It Monday: Simple Shirt Makover

Since Tot is younger than Boo, it is only natural that Tot wears lots of hand-me-downs.  But Boo is about 6 years older than Tot.  Fashion can change a lot in 6 years.  When Boo was younger, I tried to purchase clothing that was somewhat plain so that I wouldn't have to worry about it not being fashionable later.  But many of Boo's shirts seemed too plain for my crazy little Tot.  So today I'm going to share a simple way to make over a shirt {that was once worn by Boo & is now fashioned for Tot}.


Gather the following supplies:


  • a shirt
  • a photo of the shape you want to put on your shirt (I chose butterflies.  I google a photo & printed it out in 3 different sizes to give the finished shirt more interest.)
  • 2 different kinds of fabric - you can use more if you like, depending on your shape & how many you are using on your shirt
  • scissors
  • Wonder Under (I love love love this stuff)
  • iron
To add your shape to the shirt, simply follow the directions on the Wonder Under packaging.  It's pretty straightforward.  Even though you don't have to, I stitched around the edges of the butterflies to keep them from fraying too much in the future.  Yes, my kids are rough on their clothes so I wanted to make sure they would stay put for a long time.  You should end up with something like this:


I fiddled with the placement of the butterflies before committing them to their final spots with the iron.  Play around with your shapes till you have a design you love.  You can tell from the close-ups that I am not fabulous at sewing by any means, ha!  But if you choose to sew your edges, use a contrasting thread to add extra visual interest to your shapes.  It turned Tot's blah hand-me-down brown shirt into something cute & totally wearable.

Did you try this??  I'd love to see!  Link it up in the comments section or shoot me an email & I just might feature your project :)

Happy Crafting!!
--Anna

5.23.2011

Make It Monday: napkin flowers

I realize it's closer to Tuesday for some, but my clock has assured me it's Monday evening here & so I can still post for Make It Monday.  I do have a good excuse for not posting earlier in the day & it involves running around like chicken with its head cut off in order to go grocery shopping, help with homework, do some yoga & finish up plans for my daughter's Kindergarten graduation for which I am in charge of decorating {more on that next week!}.

 Today's little project comes without instructions, for they are already posted on the MADE blog {along with truckloads of other fun tutorials}.  Go check it out.   I spotted some napkin flowers over there & knew it would be just the thing to pretty up a dessert table I was putting together for the ladies at church. 

Now they happily sit on my kitchen windowsill.  Hello.  Aren't they pure loveliness??  Um, yes.  Yes they are.  Wouldn't these be perfect at a party, shower or even wedding?  The answer to that would be yes.


I thought it would be fun to sweeten my blooms up a little more, so I wrapped the sticks {I mean, stems} with green floral tape. I only wish I had longer stems so that I could put multiple blooms in one jar. My blooms are spoiled because each one has it's own jar ;)


Now go and make some.  After you see how easy it is to make just one, you'll want to make more & more & more.....  I'm pretty sure these are going to find their way into my 12 year old's 13th birthday party decor in August.

I hope your Monday was lovely,
--Anna

10.12.2010

Make It Tuesday: treat bags

The hubbs & I spent 2 evenings watching Wyatt Earp a couple of weeknights ago.  I am typically not a Kevin Costner fan, but this movie was so well done.  It was so well done, in fact, that we decided it would be cool to take our kiddos to see the very same OK Corral where Mr. Earp once stood.   The old town of Tombstone is just a 2 hour drive from where we live, so we decided to make it a fun day trip.  If you live in AZ (or not) & have never been, you should go.   Our boys were a big hit with the cowboys roaming the town, getting high fives from some because they were sporting new badges & hats from home.  Mr. Earp (whom we had seen in the OK Corral shootout) complimented Booga on his black attire.  It was pretty sweet.


So that's what we were up to on Monday.  And today proved to be another long day, only today we didn't leave the house.  Lots of chores were done, instrument (violin) practiced, book reports written out, bicycles were ridden, booktime on the couch was done & a little treat of fudge was had just after teeth time (I'm a bad mommy, I know, hee hee). 

But I also got around to making these cute treat bags & wanted to share them with ya!   So the story is that I bought these plain black canvas bags at Target a couple of years ago, just after Halloween.  They were on a shelf with other misc. items that were deeply discounted.  I can't remember how much I paid for each, but it was something like $1.  And there just happened to be 4 of them - the exact number I needed.  Perfect.

 But plain black is boring & blah.  I decided this would be the year to cuten them up a bit.  I found some cool Halloween fabric on sale at JoAnn's, along with some trim & a new package of Wonder Under. 


The top was a piece of cake!  I made a ruffle, sewing it down the center & then sewed a piece of orange ball trim on top of the center of my ruffle.  Too cute!!


In the bottom right corner (if you're facing the bag) I made a large yo-yo out of the same fabric I used for the ruffle.  It kind of sparkles & I just love it.  Plus, I needed something a little more sophisticated than cute ghosts & witches for my 12 yr. old.  This fabric was perfect!  I layered a black & white button in the center for added cuteness.


The boys needed something a little more on the....well.....boyish side. So I got them fabric with a cool print that kind of shimmers. With the help of a breakfast bowl, I drew this skeletal shape. Then I worked some magic with Wonder Under (which I LOVE, by the way. I've never used it but now I am totally addicted.) After it was stuck in place, I embroidered an edge around the whole shape & the eyes.


 Then I did some embroidered lines for the mouth.


To finish it off, I added pearls for eyes.  Fun, eh??


I can't wait for Halloween this year so the kids can actually use their new cute bags! 

More Halloween goodness to come!
--Anna

10.04.2010

Make It Monday: Decorating Ideas

I'm posting today's Make It Monday super late today - sorry!  It's been a loooong day.  So on to the good stuff :)  This month's Make It Monday posts will be filled with Halloween DIY's & lots of inspiration - I have lots of fun things to share!! 

Today, let's talk Halloween decor.  Are you a minimalist when it comes to decorating or do you go all out?  I'm kind of in the middle.  It's taken me 13 years (my entire married life - sad, I know.) to figure out just what my decorating style is.  So I never bought very many decorations because I didn't want to invest in something that wouldn't match everything else.  Now that I've got that figured out (oh, my style is modern country w/a vintage twist - how's that for long & maybe confusing?) decorating should be a cinch :) 

Here are a handful of sweetly decorated areas of the home that have caught me eye this week:

I love how this entrance is perfect for Fall and Halloween.  Once Halloween is over, the pumpkins & gourd ghosts can be removed.  The rest can be left up through Thanksgiving.  Perfect!


This decorating idea is so clever!  Simply cut off the handle of the pumpkin (you know, the hard viney thing you hold it by.  Does it have a technical name?  Because if it does I don't know it.), add painted black twigs where the handle once was & hang cute bats with orange string from its branches.  Oh, & by the way, I am in love with this side table.  Seriously in love.
                                                                          [source]

I just love the mix of black, white & orange in this room.  Small pumpkins are the cutest and with them, more really is merrier.  And see those candy dishes??  I must have them!

                                                                            [source]


Having a party??  This would be such a cute table for your guests to linger by & munch on popcorn, cookies & other delicious treats.  Mmmmm....my mouth is starting to water.  (note to self:  do a Make It Monday: Recipes post).
ps - don't you just love that bouquet of all black flowers.  it's super cool.
                                                                          [source]

I hope this gets you into the decorating spirit if you haven't begun already.  I still have a few things to put up tonight - like our semi-spooky tree that seems like it can only be put together by 2 people, so I will have to wait for the hubbs to get home.

Stay tuned for a post of my Halloween-ish home decor on Wednesday!!
--Anna

9.27.2010

Make It Monday: Quicky Birthday Card

I'm super happy you're here for Make It Monday!  Okay, so today's project is easy, quick AND cute.  How can you resist that??!  Plus, it's so stinkin' easy that your kids can make them on their own once they've made just one.  So let's get started:

step 1: by premade blank cards
I found some cute premade polkadot cards in the $1 section at Target.

step 2: add a cute sticker to the front
I let my Tater Tot choose a feltie Sassafras sticker from my scrappy stash.  Then I had her put it in the bottom right corner. 

step 3: add a phrase inside using letter stickers
Tot wanted to make a birthday card for her friend, so I sounded out each letter she would need to spell out Happy Birthday.  It made it a fun little game for her & she ended up with a cute card to boot!


Oooh oooh!  I have a special announcement:  There will be 4 Make It Monday posts in October.  That's right.  I said 4!!!!  I may even get a little overzealous and throw in an extra project or 2.  Fabulous fun is in store!!  Spread the word - I love followers ;)

Happy Monday,
--Anna

9.13.2010

Make It Monday: Fabulous Pocket Apron

I'm so glad you're here for Make It Monday!! Today's project is a super cute apron. I made this for some little kids at church that have singing time. I thought this would be a fun way for the kids to choose songs to sing. Don't get it?? You'll see...... Let's get started!

Step 1: Cut squares of fabric to make pockets
The size of your squares will depend on how many you want on your apron. My apron has 5 squares & each square was 6 x 6in. My squares are cut from fabric scraps I have in my stash.


Step 2: Iron & Sew
Iron your squares in the following way: Fold up the bottom & press. Fold in the sides & press. Fold the top down & press. Keep the pocket upside down as you sew (folds should be facing upward). Then sew each pocket, starting with the bottom, the sew the sides & then sew the top. Now you have a flat pocket. Be sure to sew on toward the inside of the fold because you will sew the pocket onto the apron toward the outside edge of the fabric
next. Once you've sewn the pocket, turn it over & sew along the top again only this time on the outer edge. You should have 2 sewn edges on the top now.

Step 3: Pin & Sew
Pin your pockets in place. The top of your pockets are already sewn twice so be sure that they open on top. I just pinned the sides & they stayed in place just fine when I sewed them on. Don't forget to remove the pins as you sew. Be sure to sew along the outer edge of the pocket. Do not sew the top of the pocket - this needs to be left open so that you can hide little things inside!!

Step 4: Add a cute border on the bottom
Add a fun ruffle on the bottom for added cuteness! I like raw edges so I tore a scrap piece of fabric & sewed it on in a cute, messy way.


Step 5: Enjoy!!
Now you have a super cute AND useful apron! The kids at church will be able to pick a card or picture out of the pockets each week that will tell them which song they will get to sing. An apron like this would be super fun for moms to use with their little ones that aren't in school yet or even for preschoolers that get to do fun activities.


Oh, & I should mention that I did not make the apron this time. I found one at church that was not being used. So this tutorial is just a fun way to make a boring apron FABULOUS!

I hope you enjoyed today's Make It Monday. Did you share it with someone? Made one for yourself or someone you know?? Post a link so I can check it out!!

Happy Monday,
--Anna